Before configuring your email program, you must remember that you need to create a Pop account via your Cpanel.
In the example below, the clients name is ‘John Smith’, the name of their domain/website is ‘www.example.com’ and their email address is ‘johnsmith@example.com’. Replace the ‘John Smith’ below with your own name, ‘example.com’ with the name of your own website, and ‘johnsmith@example.com’ with your own email address
Step 1: Click on ‘tools’.
Step 2: Click ‘account settings’.

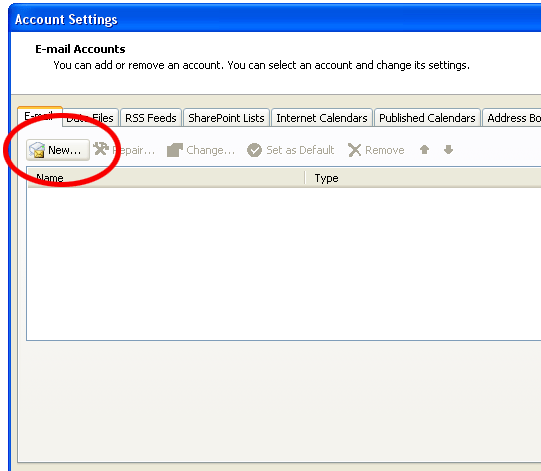
Step 3: Click on the ‘New’ button.
Step 4: Fill in the blank spaces
Your Name: The name you wish displayed when people recieve your emails
E-mail Address: The E-mail address you are sending email from, johnsmith@example.com
Password: The password you created when you setup your email account.
Re-type Password:The same password you created when you setup your email account.
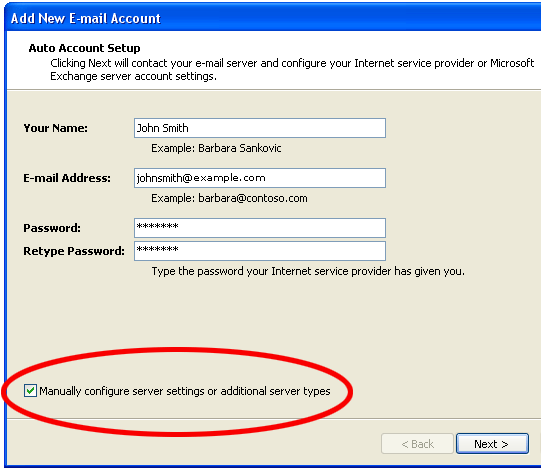
Step 5: Tick the box that states ‘Manually configure server settings or additional server types.
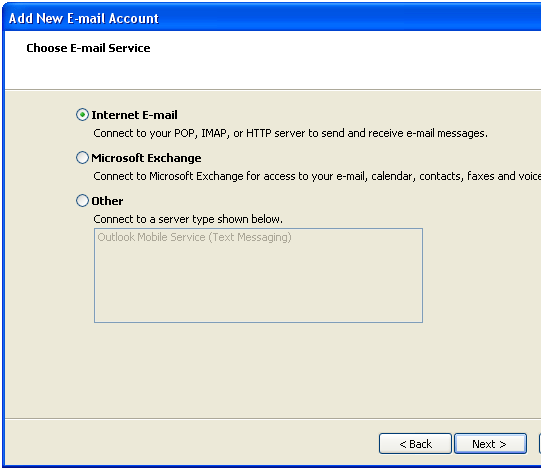
Step 6: Make sure the radial ‘Internet Email’ is selected and click next.
Step 7: Fill in blank spaces
Your Name: The name you wish displayed when people recieve your emails
E-mail Address: The E-mail address you are sending email from, johnsmith@example.com
Incoming mail server: mail.example.com
Outgoing mail server: mail.example.com
User Name: Your full email address is required, ‘johnsmith@example.com’
Password: The password you created when you setup your email account.
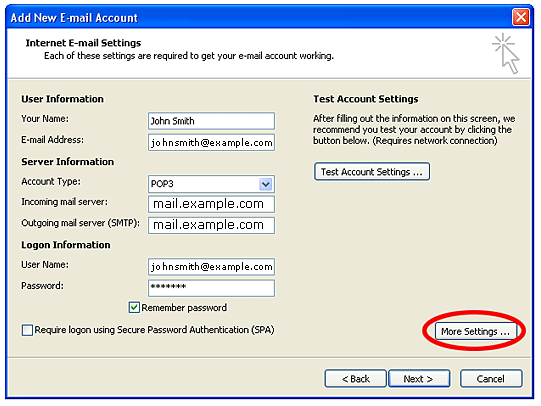
Step 8: Click on the ‘more settings’ button.
Step 9: Click the ‘Outgoing Mail server’ tab.
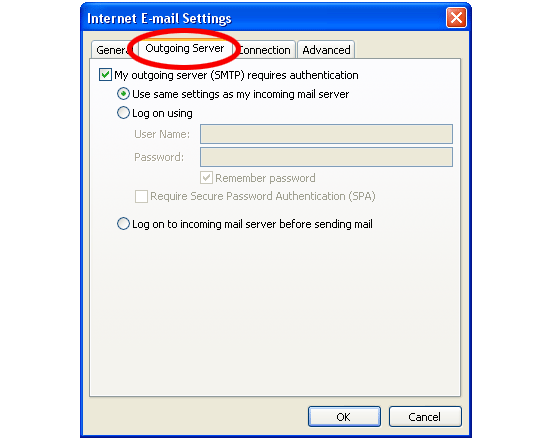
Step 10: Tick ‘My outgoing mail sever (SMTP) requires authentication and select the radial ‘use same settings as incoming mail server’.
Step 11: Click the ‘Advanced’ tab.
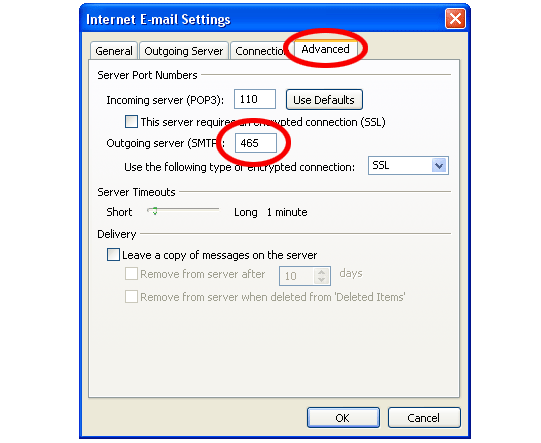
Step 12: Change the ‘Outgoing server SMTP’ port to 465.
Step 13: Under the ‘Outgoing server SMTP’ port, you’ll see the phrase ‘Use the following type of encrypted connection’ Choose SSL from the drop down menu.
Step 14: Click ok.
Step 15: Click Next and Finish
Step 16: Click ‘Close’.
Congratulations you have now correctly setup your email account in Outlook 2007.
